728x90
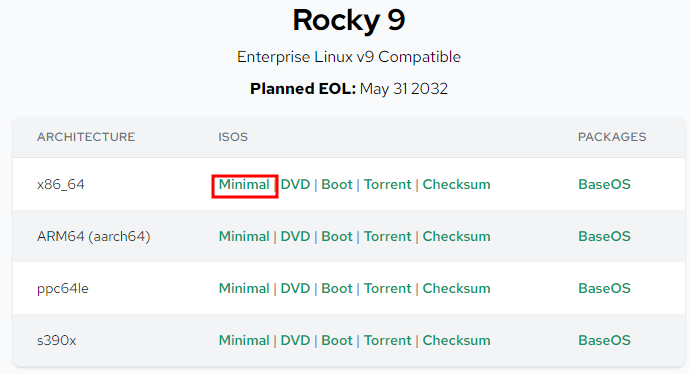
https://rockylinux.org/download/
Download Rocky | Rocky Linux
Rocky Linux is an open enterprise Operating System designed to be 100% bug-for-bug compatible with Enterprise Linux.
rockylinux.org
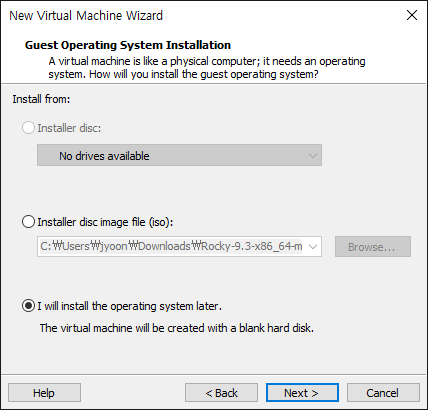

어차피 ova로 내보낼 것임~
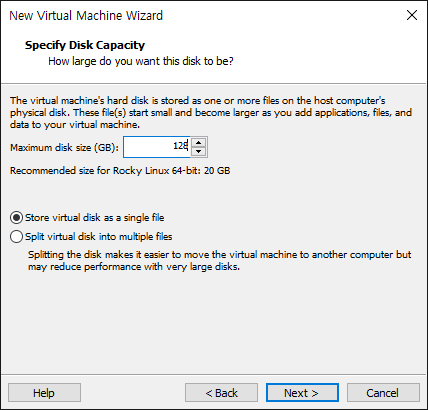

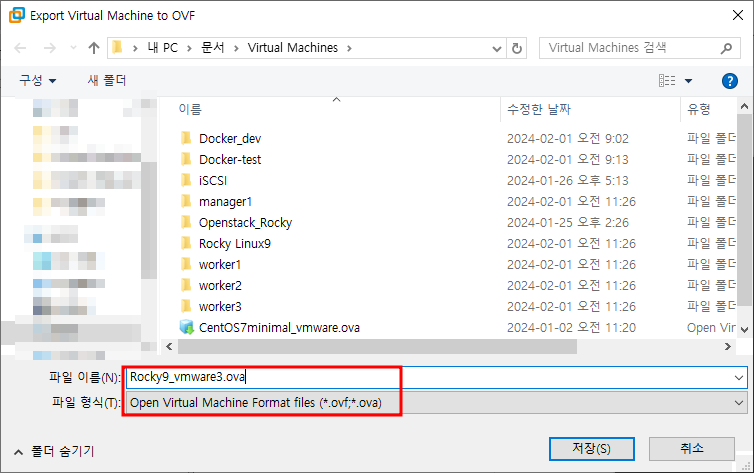
설치가 완료되면 ova로 내보내기~~
all nodes
--- Kubernetes
--- all nodes

# dnf update -y
# timedatectl set-timezone Asia/Seoul
# systemctl disable --now firewalld
# setenforce 0
# swapoff -a
# sed -i '/ swap / s/^/#/' /etc/fstab
# sed -i 's/^SELINUX=enforcing$/SELINUX=disabled/' /etc/selinux/config
# tee /etc/modules-load.d/containerd.conf <<EOF
overlay
br_netfilter
EOF

# modprobe overlay
# modprobe br_netfilter

# tee /etc/sysctl.d/kubernetes.conf<<EOF
net.bridge.bridge-nf-call-ip6tables = 1
net.bridge.bridge-nf-call-iptables = 1
net.ipv4.ip_forward = 1
EOF

# sysctl --system

# dnf install -y dnf-utils device-mapper-persistent-data lvm2
# dnf config-manager --add-repo https://download.docker.com/linux/centos/docker-ce.repo
# dnf update -y && dnf install -y containerd.io
centos8 버젼부터 dnf, yum과 함께 사용하다가 centos9부터는 dnf로 설치를 하고 있다.
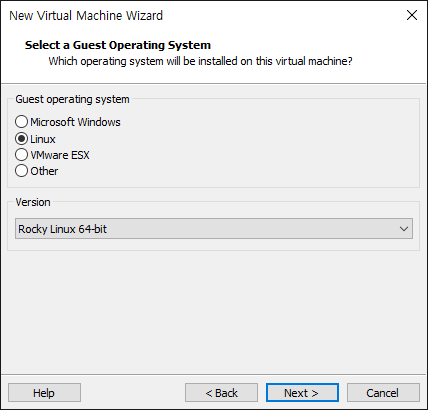
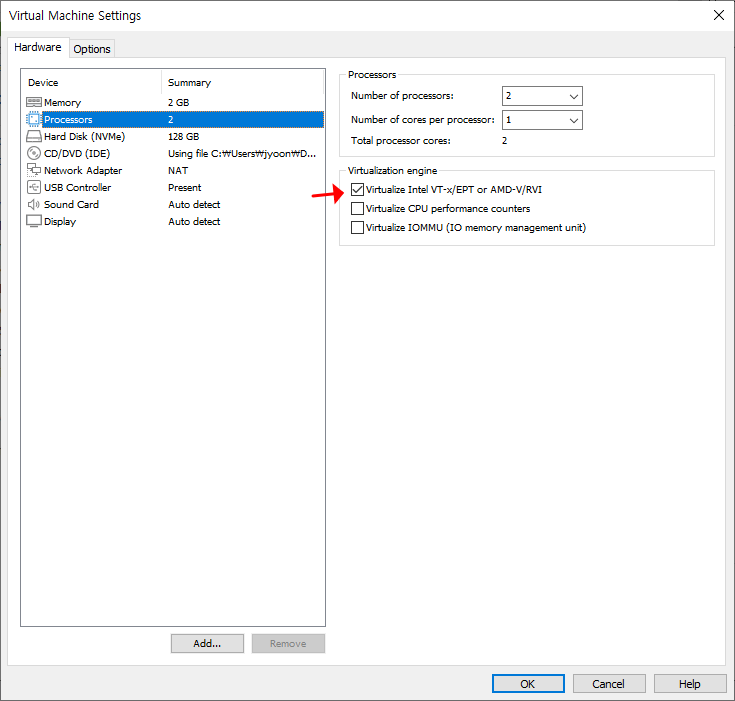
전부 설치 후 linked clone으로 worker1,2,3 만들기!
# mkdir -p /etc/containerd
# containerd config default | sudo tee /etc/containerd/config.toml >/dev/null 2>&1

# sed -i 's/SystemdCgroup \= false/SystemdCgroup \= true/g' /etc/containerd/config.toml

# systemctl restart containerd
# systemctl enable --now containerd

# cat <<EOF | sudo tee /etc/yum.repos.d/kubernetes.repo
[kubernetes]
name=Kubernetes
baseurl=https://pkgs.k8s.io/core:/stable:/v1.28/rpm/
enabled=1
gpgcheck=1
gpgkey=https://pkgs.k8s.io/core:/stable:/v1.28/rpm/repodata/repomd.xml.key
exclude=kubelet kubeadm kubectl cri-tools kubernetes-cni
EOF

# dnf install -y kubelet kubeadm kubectl --disableexcludes=kubernetes
# systemctl enable --now kubelet

# poweroff
# nmcli con mod ens32 ipv4.method manual ipv4.address 172.25.0.170/24 gw4 172.25.0.2 ipv4.dns "8.8.8.8 168.126.63.1"
# nmcli con mod ens32 ipv4.method manual ipv4.address 172.25.0.171/24 gw4 172.25.0.2 ipv4.dns "8.8.8.8 168.126.63.1"
# nmcli con mod ens32 ipv4.method manual ipv4.address 172.25.0.172/24 gw4 172.25.0.2 ipv4.dns "8.8.8.8 168.126.63.1"
# nmcli con mod ens32 ipv4.method manual ipv4.address 172.25.0.173/24 gw4 172.25.0.2 ipv4.dns "8.8.8.8 168.126.63.1"
# hostnamectl set-hostname "master1" && exec bash
# hostnamectl set-hostname "worker1" && exec bash
# hostnamectl set-hostname "worker2" && exec bash
# hostnamectl set-hostname "worker3" && exec bash
전체모드로
# cat <<EOF >> /etc/hosts
172.25.0.170 master1
172.25.0.171 worker1
172.25.0.172 worker2
172.25.0.173 worker3
EOF
-> 다 하고 나서 핑 날려보기!
--- Master ---
# kubeadm init --apiserver-advertise-address=172.25.0.170 --pod-network-cidr=10.244.0.0/16
# mkdir -p $HOME/.kube
# cp -i /etc/kubernetes/admin.conf $HOME/.kube/config
# chown $(id -u):$(id -g) $HOME/.kube/config
# kubectl apply -f https://raw.githubusercontent.com/flannel-io/flannel/master/Documentation/kube-flannel.yml
# kubectl apply -f https://raw.githubusercontent.com/projectcalico/calico/v3.27.0/manifests/calico.yaml
# kubectl get pods --all-namespaces
# dnf install -y bash-completion
# source <(kubectl completion bash)
# echo "source <(kubectl completion bash)" >> ~/.bashrc
# exit
--- Node ---
# kubeadm join 172.25.0.170:6443 --token bhgyvc.2y19jbxp02u9nhmp \
        --discovery-token-ca-cert-hash sha256:0bac7d07a06a5ec3a7df5685a6d5bd70509af27f929ccff7798795c0c7491b08

----Master----
# kubectl get node  #이건 마스터모드에서
-> 여기서 스냅샷 한방 찰칵!
728x90
'Linux' 카테고리의 다른 글
| 특정 버전의 MariaDB 설치하기 (0) | 2024.05.07 |
|---|---|
| 특정 버전 Nginx 설치하기 (0) | 2024.05.07 |
| Vcenter 설치 (0) | 2023.12.15 |
| iSCSI Target 셋팅하기 (4) | 2023.12.14 |
| ESXi (0) | 2023.12.13 |


